DIY Threaded Photo Card
Carol Duvall Show : Episode CDS-1537
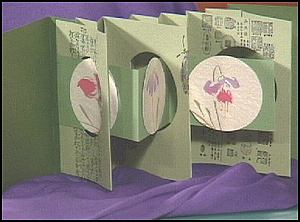
alternative design Project designed by Leila Steineckert.
www.hgtv.com
Materials:
3-1/2" x 4-1/2" paper
circle cutter
craft knife
cutting mat
rubber stamps
ink pads
glue/tape
color markers
decorative scissors
ruler
pencil
photographs (cut into 2-3/4" circles)
two 5-3/4" x 6-1/4" decorative papers
2-1/2" x 17" paper strip for photograph circles
5-1/2" x 18-1/2" paper strip for back of the card
5-1/2" x 25-1/2" paper strip for the circle cutouts
paper clips.
Steps:
1. Using the 5-1/2" x 25-1/2" strip of paper, measure and score six 4-1/4-inch sections. Fold the sections back and forth into accordion folds.
2. Lay down the strip of paper folded together. Measure and mark 1/2 inch in from the folds and cut 3-inch circle holes through all the sections using a circle cutter and cutting mat (figure A).
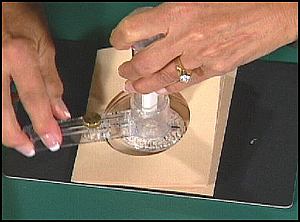
Figure A.
3. Stamp and decorate the paper strip (figure B).

Figure B.
4. Fold the 2-1/2" x 17" strip of paper in half. Measure and score 3-3/4 inches from the center fold on each side of the paper strip. Fold the strip into accordion folds.
5. Place the 2-1/2-inch strip so the two mountain folds are up (figure C).
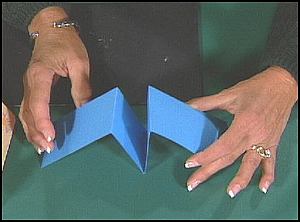
Figure C.
Thread this strip through the strip with the holes so you have small mountain folds between the larger mountain folds. The ends of this strip will be glue on front of the hole strips on each end (figure D).
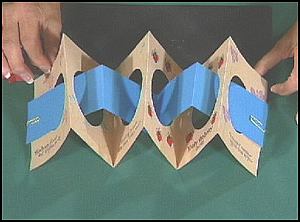
Figure D.
6. Using the 5-1/2" x 18" strip of paper, measure every 1-1/4-inch for 14 sections and then score the 14 sections. Fold the strip of paper into accordion folds.
7. Place the accordion strips with 1-1/4-inch folds so that seven mountain folds are facing up (figure E).

Figure E.
8. Place the strip that has the hole cutouts on top so that you have three mountain folds up. Glue the ends of this strip to the outside ends of the accordion strip with 1-1/4-inch folds (the back panel). On the fifth section (fold) from each end of the back panel, glue a valley fold of the cutout section to it (figure F).

Figure F.
9. Cut four 2-3/4-inch round images from photographs (figure G).

Figure G.
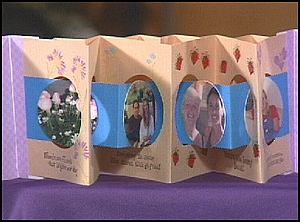
10. Add your circle photographs to each side of the mountain folds on the smaller strip that is threaded through the card. The first and last photos are centered in the middle of the threaded strip of paper so they are on top of the hole cutouts (figure H).

Figure H.
The other two photos are placed about 1/4 inch from the folded edges (figure I).
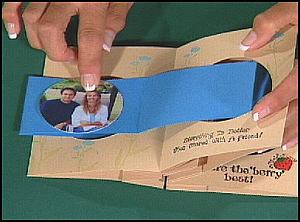
Figure I.
11. Use two decorative papers for the covers that measure 5-5/8" x 6-1/4". Measure 5 inches lengthwise from the ends of both covers and then score.
12. Stamp designs on a 3-1/2" x 4-1/2" paper. Color stamped images.
13. Cut the edges of the paper with decorative scissors. Run a color marker around the edges of the paper.
14. Glue stamped paper to the front decorative cover (figure J). (Of course you can change the design of the front cover with a wedding picture or words "Thank You")
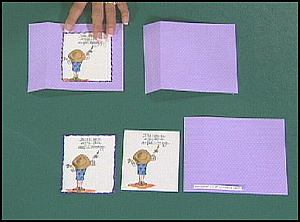
Figure J.
15. Add your card covers to the front and back of the card. You will glue the small tab on the covers behind the mountain fold on each end of the card (figure K).

Figure K.
Tips:
You can decorate your panels by using stickers.
Instead of using photos, you can stamp images on the circles.
Use paper clips to hold items in place as you are working on the project.
GUESTS:Leila SteineckertCrafter, Creative EnhancersLa Jolla, CA
Phone: 858-270-4188
E-mail: circlelady@san.rr.com
No comments:
Post a Comment